Must-know guide for moving from BlackBerry to Android

Business professionals cannot afford to lose data during a move to Android.  This guide helps you reliably move email, business relationships, calendar agenda, to-do lists, notes, and text messages from BlackBerry to any Android phone or tablet.

Email

Android’s email app supports Exchange, IMAP, POP3, and Google/Gmail accounts.  This lets you to set up virtually any email service.  Here is a basic guide to set up email on Android.  If you need incoming/outgoing server details about your specific email service, do a Google search for your service’s name followed by “IMAP settings”.

Here are settings for some popular email services:
Yahoo! – https://mobile.yahoo.com/mail/android (click on the IMAP tab)
AOL – https://email.about.com/od/accessingaolmail/f/AOL_Mail_IMAP_Settings.htm
Hotmail – https://windows.microsoft.com/is-IS/hotmail/mobile?t1=t4

Contacts, calendar, tasks, and notes

You can use one free app to move all of this data.  CompanionLink has software that will sync Outlook with Android.

Step 1: Use BlackBerry Desktop Software to backup your BlackBerry data to Microsoft Outlook.

Step 2: Download a free 14-day trial of CompanionLink for Outlook to your PC. Configure it to sync Outlook to Android using the DejaCloud service. Here is how your setup should look when configured correctly.  (If you want to continue synchronizing Android with Outlook after the 14-day trial is over, you can buy a license for $14.95.)

Step 3: Click the Sync button in CompanionLink and watch your Outlook data move to your Android.

Text messages

David Hope has developed a free tool that moves SMS text messages from BlackBerry to Android.  The tool is available at https://hope.mx/blackberry2droid.

Get it right the first time by hiring a professional to do it for you

CompanionLink offers a $49 service where a migration expert will log into your PC and move your data from BlackBerry to Android.  The service is called RunStart and has been used by hundreds of business professionals to safely move their data to Android without data corruption or data loss.

If you have any questions about moving to the Android platform, email us at sales@companionlink.com.

How to Sync Your Android Phone and Tablet with CompanionLink

Did you know that you can sync both an Android phone and tablet with just one license of CompanionLink for Outlook?

When you’re syncing Android devices with Outlook, we’ve designed a feature that allows you to swap devices in CompanionLink 5 for Outlook without adjusting any other configuration.

The secret lies in our USB and WiFi sync options. Simply switch the phone and tablet at any time – there’s no extra configuration required – and your data will sync effortlessly.

Note that this only works when syncing via USB and WiFi. For syncing multiple devices via CompanionLink Secure Hosted, Google, or Windows Live, you’ll need CompanionLink Express 5 or CompanionLink Professional 5.

While this is a great little feature, it’s really only the beginning. More and more people are beginning to use multiple mobile devices on a daily basis. We intend to continue our efforts to make syncing your data to all your devices as simple and seamless as possible!

PSA: Secure Your Mobile Devices

Think about all the data you have on your phone. These days, that’s more than just a list of phone numbers. We have email accounts, social networking profiles, mobile banking, private notes and documents, and so much more. If our phones were lost and consequently found by someone with less than honest intentions, the list of potentially compromised information would be daunting.

But just how bad could losing your phone be? Symantec recently decided to find out. They intentionally “lost” 50 Android smartphones across various large cities in the US and Canada. Each device was loaded with what appeared to be private data and fitted with special software that allowed Symantec to track what happened. The results? Well, they’re not promising.

Over 95% of the time, those who found the lost device made an attempt to access data such as email or online banking information. 

Let that sink in for a minute. Based on the results of this study, it is safe to assume that if you lose your phone, someone will be poking through all your private and personal data. On a slightly happier note, some sort of attempt was made to return the phone about half the time. But even in those cases most people went snooping around first. Some even directly admitted to doing so, apologizing after the fact. Check out the full report here [PDF].

The moral of the story? Ensure your data is secure! Whether this is through a passcode or gesture based lock, remote wipe capabilities, encrypted data, private records (in the case of DejaOffice), or some combination of these. Your phone simply contains too much personal data to remain unsecured in some way.

Making Sense of Your Data

As we put more and more information on our mobile devices, it can become difficult to make sense of what’s there. Let’s face it, the smaller screens just aren’t optimized for displaying large amounts of data very effectively.

That’s why we built powerful organization options into DejaOffice. With our filtering, sorting, and grouping features, we’re able to help you make sense of your data.

Learn just how to use them in the video below, then leave a comment telling us your favorite combination of filtering, sorting, and grouping.

How to Sync Your Google Tasks with Outlook

Google Tasks can be great – they’re easy to use and tied to your existing Gmail or Google Apps account. It’s definitely convenient. Getting tasks out of Gmail or Google Apps, however, can be anything but convenient. Until now.

CompanionLink has supported syncing Google Tasks for some time, but it was limited to a single task list within Google. With our most recent update to CompanionLink 5, you are now able to sync multiple Google Task lists with Outlook and DejaOffice.

Here’s how it works.

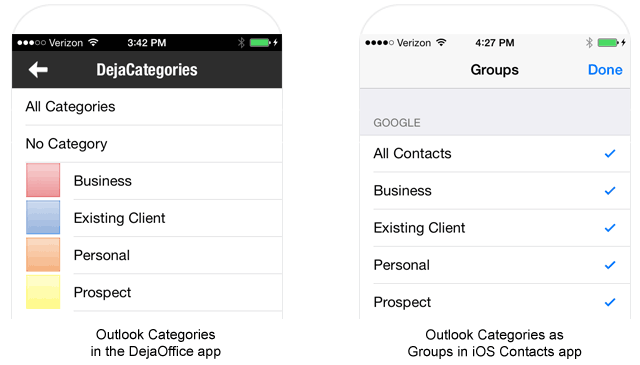
If a task in Outlook has a category that matches a task list name in Google, then the Outlook task will sync to that list in Google. Similarly, if a task in Google has a task list name that matches a category in Outlook, then the Google task will sync to that category in Outlook.

Alternatively, if a task in Outlook does not have a category that matches a task list name in Google, then the Outlook task will sync to the default list in Google. If the opposite is true and a task in Google has a task list name that is not a category in Outlook, CompanionLink will create a matching category as part of the sync process.

Sync Google Tasks to Oulook

Google Tasks sync to Oulook with categories translated as Task Lists

Want to get started syncing your Google Tasks with Outlook today? Just download the latest build of CompanionLink 5: update | free trial

How to Password-Protect Contacts, Calendars, & More with DejaOffice

DejaOffice makes it easy to protect your private data. With our Private Records feature, you can secure contacts, calendar events, tasks, memos, and even expenses. And it does so selectively, allowing you to secure your most sensitive data while keeping your standard data easily accessible.

Interested in learning how Private Records work? We thought you might be, so we made a video. Check it out below to get started:

Preventing Duplicate Records in Salesforce CRM Before Syncing Your Data

An important first step in setting up any sync is ensuring that the database you wish to sync is ready to go. Part of this process often means cleaning up any duplicates before syncing. Our friends over at Starrforce have offered to share some tips for dealing with duplicates (and preventing them in the first place!) in Salesforce CRM. Read their post below:

“If you have used any business management software or CRM software you understand that duplicate records are a way of life. Salesforce duplicates are common in all size companies and contributing factor to low user adoption of Salesforce. Although it is a best practice to search before creating a record, duplicates still happen. Salesforce understands this and has tools built in to help you merge duplicate leads, accounts, and contacts.

Removing Salesforce duplicate records becomes even more important when you are syncing your data to other systems using CompanionLink, since you do not want to sync any duplicates into your other tools such as Microsoft Outlook.

Your sales leads in Salesforce probably came from multiple sources like purchased lists from sales lead generation companies, campaigns, trade shows, and manually entered. The Salesforce Lead Import Wizard does a good job of finding duplicates before they are mass uploaded but what do you do when they are already in the CRM system?

When you first go to work a new sales lead in Salesforce, the first thing you should do is click the “Find Duplicates” button. This searches the CRM system for matching leads, contacts, accounts, and opportunities based on the lead full name, last name, company, phone number, email, or email domain. You have the option to include or exclude any of the search criteria. By doing this duplicate search first, you may find that the new sales lead is actually a contact with a slightly different spelling in your Salesforce CRM system. Or, your co-worker may have been at the same trade show and entered the same lead.

If a contact matches the lead exactly, then depending on your sales lead process, you should either delete the lead or convert it into the existing contact and account. If you find a duplicate lead, then you can use the “Merge Leads” button. You are presented with a screen that gives you the option to pick any differing data and to select which is the master record. Any related items from the duplicate lead(s), such as activity or campaign information will be associated to the merged lead so you do not have to worry about manually moving these.

To merge accounts in Salesforce, you must first open the “Merge Accounts” tool from the Tools section on the accounts tab. Then you can do a search for the accounts to merge. This search is quite simple if you know that the accounts all start with Acme as you can just search for Acme*. But how do you search for Acme Business Management Software, ABMS, and Business Management Software by Acme?

The only way to bring accounts into the merge tool that have different names that cannot be found in a single search is to rename the accounts. Find your second, third, and other (you can only merge three accounts at a time) accounts and rename the duplicates so that they can all be found from a single search.

Once you have selected the accounts to merge, you will be presented with a page like the “Merge Leads” page where you can select the master record and any differing data. All records associated to the merged accounts will be added to the master account.

When merging duplicate accounts and/or contacts in the Salesforce CRM system, please keep in mind that it is a best practice to first merge the accounts as all the contacts will be associated to the merged account.

Once the accounts have been merged, then you can go to the contact related list to merge the contacts. Contacts can only be merged from the account they are associated with so by merging the accounts, all of the duplicate contacts will be associated to the merged account.

If you have duplicate contacts in an account in your Salesforce CRM system, select the “Merge Contacts” button in the contacts related list on the account detail page. You are then presented with a list of contacts where you can either search for specific contacts or view all of them. Once you have selected the contacts to merge (you can only merge up to three contacts at a time), you will be presented with a screen like the two above where you can select the master record and any differing data. All records associated to the merged contact will be associated to the resulting merged contact.

For leads, accounts, and contacts, there is some basic Salesforce automation available to make merging easier. But what happens if you have duplicate cases, opportunities, or custom object data? At this time, Salesforce does not have a tool to help with these objects so they will have to be merged manually. This is another reason to do a search before creating a record.

To merge records where there is not a merge tool in the Salesforce CRM system, first decide which record will be your master record. This should be the one with the most correct data and the most related records like activities or attachments.

Open each duplicate record in a new tab in your browser and copy any needed data from the duplicate into the master. Then copy the master record name or number and edit any related activities, attachments, or other records one at a time and paste the master record name or number into the “Related to” field. When you save, the record will be associated to your master record. Once all of the related data has been moved or associated to the master record, you can now delete the duplicate records. You may want to let the creator of the duplicate record know about it so they can be more careful in the future. You may also want to create some basic reports that you can run on a regular basis so that you can easily spot Salesforce duplicates before they get out of hand.

StarrForce is a leading Salesforce partner that helps companies optimize and support Salesforce.

Sync the Kindle Fire with ACT!

Is the Kindle Fire the “iPad killer” that many proclaimed it would be? Maybe not quite. But I think it’s a great device at a great price, and quite a few people agree with me it would seem. With an estimated 5.5 million Fires sold last quarter, it’s safe to say this is one hot tablet! But how do you make this great little tablet work for you when it comes time to get down to business? That’s where CompanionLink comes in!

Syncing the Kindle Fire with ACT! is made easy with CompanionLink. You’ll need DejaOffice on your Kindle Fire to get started, so grab it from the Amazon Appstore if you haven’t already. It’s free.

Once you’re set up with DejaOffice, you’ll need to ensure you have either CompanionLink Express (download | upgrade) or CompanionLink Professional (download | upgrade) installed on your computer. Then, simply select Android as your device in the CompanionLink setup window. Next, choose your sync method. We offer Direct USB sync, Local WiFi sync, and Secure Hosted Wireless sync. Finally, select ACT! as your database and configure as desired. For full setup instructions for ACT!, click here.

So there you have it – a quick and easy way to sync ACT! with the Kindle Fire. Now you can take your data with you, wherever you need it.

How to Sync Google, Salesforce, & More with iCloud

It seems like it should just work. If you set up iCloud to sync with Outlook using Apple’s iCloud Control Panel and you’ve set up Google, Salesforce, or another CRM to sync with Outlook, it should all sync up nicely – right?

When you set up iCloud to sync with Outlook, the iCloud Control Panel creates a unique Outlook Folder, which it then uses to sync with iCloud. It will actually move items from your default Outlook Folder to this new iCloud Outlook Folder in order to facilitate the sync. This doesn’t really change how things look in Outlook, but it does change how things sync.

Many tools that sync CRM solutions such as Google and Salesforce are set to sync with only the default Outlook Folder, with no option to change this. Because iCloud is syncing with a different Outlook Folder, these two sync tools don’t work together. Fortunately, CompanionLink is different.

CompanionLink allows you to choose which Outlook Folder(s) you want to sync with. So if you want to sync Google with Outlook and iCloud, or Salesforce with Outlook and iCloud, it’s as easy as configuring CompanionLink to sync with the iCloud Outlook Folder. From there, any data synced from sources like Google or Salesforce will sync through iCloud to your iOS devices and any other PC or Mac that iCloud is configured on.

For details on configuring which Outlook Folder(s) to sync with in CompanionLink, see our Configuring Outlook support article.

Switching to Android: A Quick Start Guide

It’s no secret that Android is an increasingly popular platform. In fact, over 700,000 new Android devices are activated daily! Many of these are from people who are switching to Android from Blackberry, iOS, or webOS. If you’re on of them, then this “Quick Start Guide” is for you. It is designed to give you a quick overview of the Android platform, and then point you in the right direction for learning more! So, what are you waiting for? Read on to get started…  Continue reading

Sync Outlook Tasks to Your Windows Phone

Recently, we’ve noticed an increased demand for syncing Outlook tasks to Windows Phone devices. There are a few options for syncing Outlook with Windows Phone devices, but even the more popular ones don’t seem to sync tasks. The good news is that CompanionLink does.

Using CompanionLink for Outlook, you are able to sync tasks, contacts, and calendars between Outlook and Windows Phone devices (running 7.5 and above) via Windows Live (formerly Hotmail). Getting started is easy – just download CompanionLink 5 for Outlook if you haven’t already. Then, simply follow the steps below:

  1. Open CompanionLink Setup on your computer.
  2. Select Windows Phone 7 as your device from the first drop down menu.
  3. Select Windows Live as your sync method.
  4. Review the pop up message, click next, then enter the account information for the Windows Live account you use on your phone. Click finish.
  5. Select Outlook as the database you wish to sync with. Configure the data and direction(s) you wish to sync. Click finish.
  6. Configure advanced sync options as desired. This is an optional step, but you may be interested in some of the advanced settings we offer.
  7. Click sync!

CompanionLink will sync your data to Windows Live, which then syncs wirelessly with your phone. It really is that easy. If you have any questions or comments for us, leave them in the comments below!

How To Sync The Kindle Fire With Google

The Kindle Fire doesn’t allow you to sync your Google Contacts and Calendar, but CompanionLink does! Here’s a quick guide on exactly how to do it:

  1. Download DejaOffice for free from the Amazon Appstore.
  2. Install CompanionLink for Google on your computer. This works with DejaOffice to sync Kindle with Google.
  3. In CompanionLink configuration, select Android as your device.
  4. Select Direct USB as your sync method.
  5. Select Google as your database from the final drop-down list.
  6. Follow the setup wizard in DejaOffice and you’ll be syncing in no time.

Note: Due to the way USB currently connects to the Kindle Fire, you’ll need to follow a specific pattern to begin the sync:

  1. Connect the USB cord to your Kindle Fire
  2. Unmount the SD card via the Notification Tray on the Kindle Fire
  3. Open DejaOffice
  4. Tap Sync

That’s it! So, whether you are the proud owner of a Kindle Fire today or are hoping to get one soon, rest assured that we’ve got you covered when it comes to syncing your data!

CompanionLink for Google comes with a free 14-day trial. When you’re ready to buy, use the affinity code SYNCKINDLE and you’ll pay just $39.95. If you already own CompanionLink 5 for Google, just make sure you have the latest version by checking our updates page.

Rearranging Your Calendar Is Easier Than Ever With DejaOffice 1.12.5

DejaOffice 1.12.5 just hit the Android Market and we’ve added some great new features to both DejaCalendar and DejaContacts. We’ve also fixed some pesky bugs, which you can read about after the break. Let’s look at what’s new…

DejaCalendar

We’ve brought two great new features to DejaCalendar. If you don’t use DejaCalendar to plan weekend events, then our new 5-day week view is for you. By trimming the weekends, we have more space to display the details of your current work week. We’ve also made rearranging your schedule significantly easier. To move an event to a new date or time, simply tap and hold the event in day or week view, then drag it to your desired date and time. Try it out for yourself – it’s really easy!

DejaContacts

In addition to the calendar enhancements, we wanted to make adding contacts even easier. So we added the ability to send and receive vCards to DejaContacts. If you haven’t heard of a vCard before, think of it as a digital business card. You can simply email or text your contact information in a format that many contact applications are able to read. Sharing your information or adding contact details for a new client is now fast and easy with vCard support in DejaOffice.

If you’d like to start using these great new features, just head over to the Android Market to download DejaOffice 1.12.5 today! Continue reading

Backup Your Data With DejaOffice

DejaOffice now automatically creates a backup of your data for you – every time you sync!

The latest release of DejaOffice for Android (1.12.3) introduced a great new feature that’s somewhat hidden behind the scenes: automatic backup. Every time you sync your data, DejaOffice automatically creates a backup first. Since this feature has the potential to be quite useful, I wanted to be sure to highlight it here.

With automatic backups, if you accidentally delete a contact, or if your database were to somehow become corrupted, you can rest assured you have a backup to restore from. And DejaOffice keeps the 3 more recent backups, so even if you don’t notice an issue right away, you’re still safe.

To restore from a backup, just follow the instructions below:

  1. Ensure CompanionLink is not running on your PC.
  2. Connect your Android device to your PC and mount it in “mass storage mode”
  3. Open the “Computer” or “My Computer” folder on your PC, then select your device’s SD card/removable drive from the list.
  4. Browse to the “\clusb\backup” folder.
  5. In this folder, you will see a file named “companionlink<date>.db” (e.g. companionlink2011-11-04.db). This is a backup of your database prior to your most recent synchronization.
  6. Rename this file to “companionlink.db”
  7. Copy the file to the “\clusb” folder. Choose to replace the existing companionlink.db file if prompted.
  8. That’s it – your data is then restored to the date of that backup.

1: Select your SD card

5. Locate your backups

If you have any questions or feedback about our new backup feature, let us know in the comments below!

What is DejaOffice?

If you’re new to CompanionLink, you’ve probably noticed several references to DejaOffice by now. In fact, you may be wondering what exactly DejaOffice is.  Well, I’m glad you asked.

In short, DejaOffice is our free Android and iOS app that helps you get the most out of your data when syncing with CompanionLink! But it’s actually a lot more than that. Instead of reading through a long post describing the app, however, why not sit back and discover DejaOffice in just 90 seconds:

How To Use Profiles In CompanionLink

Profiles in CompanionLinkIt’s not all that uncommon anymore to have a both a smartphone and a tablet. We’re integrating these powerful mobile devices into our everyday workflow, and we need them to stay in sync. To help you keep up to date on all your devices, we created the “Profiles” feature, now found in CompanionLink Express and Professional 5.

Profiles allow you to create unique sync settings for all of your different devices. In CompanionLink Express 5, you can create 2 Profiles; in CompanionLink Professional 5, you can create 5. Creating a Profile is easy – just click the Profiles button in the upper right corner of CompanionLink and select “Manage Profiles.” From there, you can add a new Profile, name it, and customize the sync settings.

Whenever you want to switch profiles, just click the Profiles button, then select your desired Profile. CompanionLink will automatically adjust your configuration to match the settings you entered when creating that profile.

Profiles make managing multiple devices easy and efficient. They’re perfect for those of us with a smartphone and a tablet. If you’d like to start using Profiles, but don’t own CompanionLink Express or Professional 5, you can upgrade or download a free trial today!